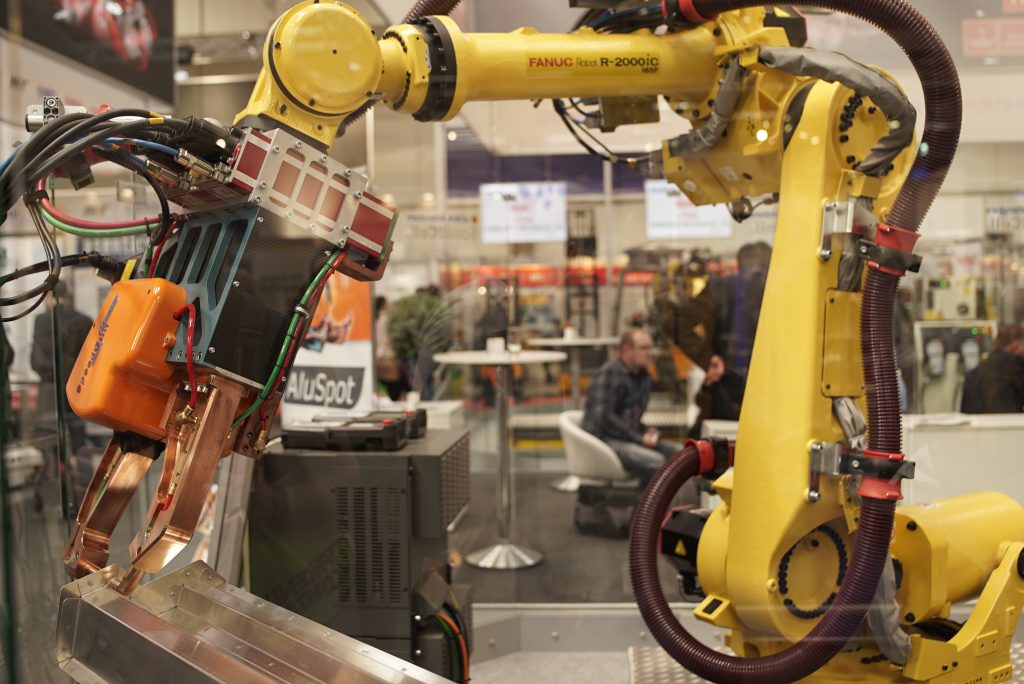

We all love a yellow robot. This guide covers how RoboVigil connects to FANUC robots, what data you get, and how setup works.
How the Connector Works
FANUC controllers speak two useful interfaces as standard. The first is the built-in FTP server — the same interface used for program backups. Through it, the controller publishes diagnostic files describing its complete state: the running program and its execution status, active alarms and the full error history, every configured I/O point and its live value, and the controller’s identity. The second is the fast interface FANUC’s own HMIs and monitoring products use (HMI Device, also known as SNPX), which serves individual values in milliseconds rather than whole files in seconds.
RoboVigil uses both. On first connection it reads the controller’s full configuration over FTP, which is what makes setup quick and easy — the machine arrives in the app already knowing what it is and what’s wired to it. Live monitoring then runs over the fast interface: I/O, program status and alarms reach your phone in around two seconds, even over 4G — we developed and tested the connector over a live 4G link. The live connection leaves no footprint on the controller: nothing is stored, and when RoboVigil disconnects the controller is exactly as it was. On controllers without the fast interface, RoboVigil detects this automatically and monitors over FTP alone.
There is nothing to configure on the controller beyond a network address. No FANUC options to buy, nothing to set on the pendant.
The connection runs through a secure WireGuard VPN tunnel from your existing router to the RoboVigil cloud. Nothing is installed on the controller and nothing is installed on-premises.
Your Signals, With Your Names
When an integrator builds a robot cell, they name the I/O: WelderReady, GasFlowOK, part present, gripper closed. Those names live in the controller’s I/O configuration, and RoboVigil reads them directly — your signals appear with the names the person who built the cell gave them, not DI[112]. A controller carries hundreds of configured points, most of them unused placeholders; RoboVigil selects the ones that matter and shows those. Grouped I/O is read as a single value under the group’s name.
Alarms and the Error Log
The error log is read every poll. Genuine faults — servo alarms, stop-class errors — raise the machine’s status banner and trigger a push notification, with the alarm code and pendant text passed through exactly as the controller reports them. Warnings and informational events are kept in the history but don’t page you. If you have an IP camera on the cell, RoboVigil saves a snapshot at the moment of the fault, so alongside the alarm code you can see what the cell looked like when it stopped.
Setting Up
On the robot side, the controller needs an IP address on the network. On the teach pendant under MENU → SETUP → Host Comm, set the IP address, subnet mask and — this one matters — the Router IP, pointed at your network’s gateway. Physically, the connection is an RJ45 cable into one of the Ethernet ports inside the controller cabinet; on many cells one is already in use for a welder or fieldbus device, in which case use the other.
On the network side, a WireGuard VPN tunnel is configured on your existing internet router — download the configuration file from the Factory Configuration page in the app and paste it into your router’s admin. For cells without wired internet, a small cellular gateway such as the Teltonika RUT276 does the same job over 4G/5G.
In the app, enter the robot’s IP address on the Machine Setup page and press Test Connection. Load Defaults then fills the mapping table with the machine’s real signals, integrator names included. Review, adjust anything you want, and save. From VPN tunnel to live monitoring takes minutes.
What You See
Machine status that matches the pendant — if the pendant says FAULTED, so does RoboVigil. The running program name. Live I/O with the integrator’s names. The alarm banner and the full event history behind it, so you can see that a cell has thrown the same servo alarm fourteen times since the last tool change. A production timeline of running, idle and faulted. And the live camera view alongside it all, on iOS, Android or the web.
What It Doesn’t Do
RoboVigil reads from the controller. It doesn’t write to it — no remote start, no program changes, no parameter edits. Remote control of an industrial robot raises safety and liability questions that are entirely separate from monitoring, and RoboVigil’s job is visibility. It fills the gap between “the robot stopped” and “someone found out”.
Tested on Real Controllers
The connector was validated on the bench at FANUC UK with their engineers, and then in production on welding cells at a UK integrator — real controllers, real integrator I/O configurations, real faults, over a real 4G link.
What It Costs
£150 per machine per month, first month free. One price, all features — alerts, history, camera feeds from your existing IP cameras — with no per-user fees and no tiers.
Who This Is For
If you run FANUC robots in production and currently find out about faults when someone walks past the cell — or when the customer rings — RoboVigil gives you real-time status, instant alerts and the diagnostic detail to respond. The same goes for integrators with FANUC installations spread across the country: you’ll know there’s an issue before your customer does, and you’ll know what it is.
Try it on your own machines — sign up at robovigil.com and connect your first FANUC robot in under an hour.
RoboVigil is a cloud-based industrial machine monitoring platform from Hagen Automation Ltd. For more information or to connect your FANUC robots, get in touch at hello@robovigil.com.